# GITHUB INSTALL
# SSH- preferred

devtools::install_git("git@github.com:MDBAuth/WERP_toolkit.git", ref = 'master', force = TRUE, upgrade = 'ask')WERP toolkit demonstration
This repo provides a templates and documentation for using the toolkit in various ways. In use, we would expect a user to consider the various capabilities demonstrated here, and then develop a streamlined flow with just those parameters (at least through the aggregator step), similar to what is shown in the full toolkit pages and implement that in an analysis repo for that particular set of analyses/scenarios.
The full_toolkit directory provides notebooks for running the full toolkit in single files, either in memory or saving each step and reading back in.
Within this repo there are also documents providing templates for each step separately (in controller and aggregation directories). These files allow exploring more of the options for calling, particularly for aggregation. There are also a few templates or examples of notebooks that are not in the toolkit flow per se, but are necessary for it (scenario_creation and causal_networks).
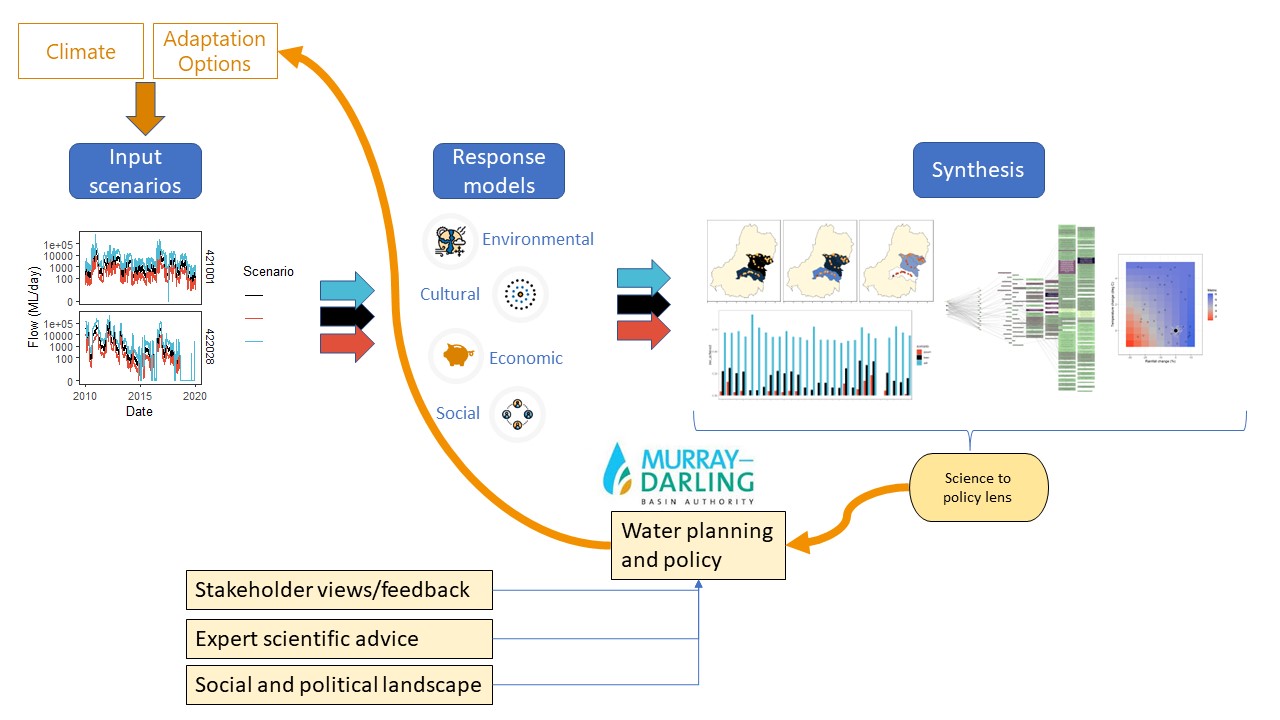
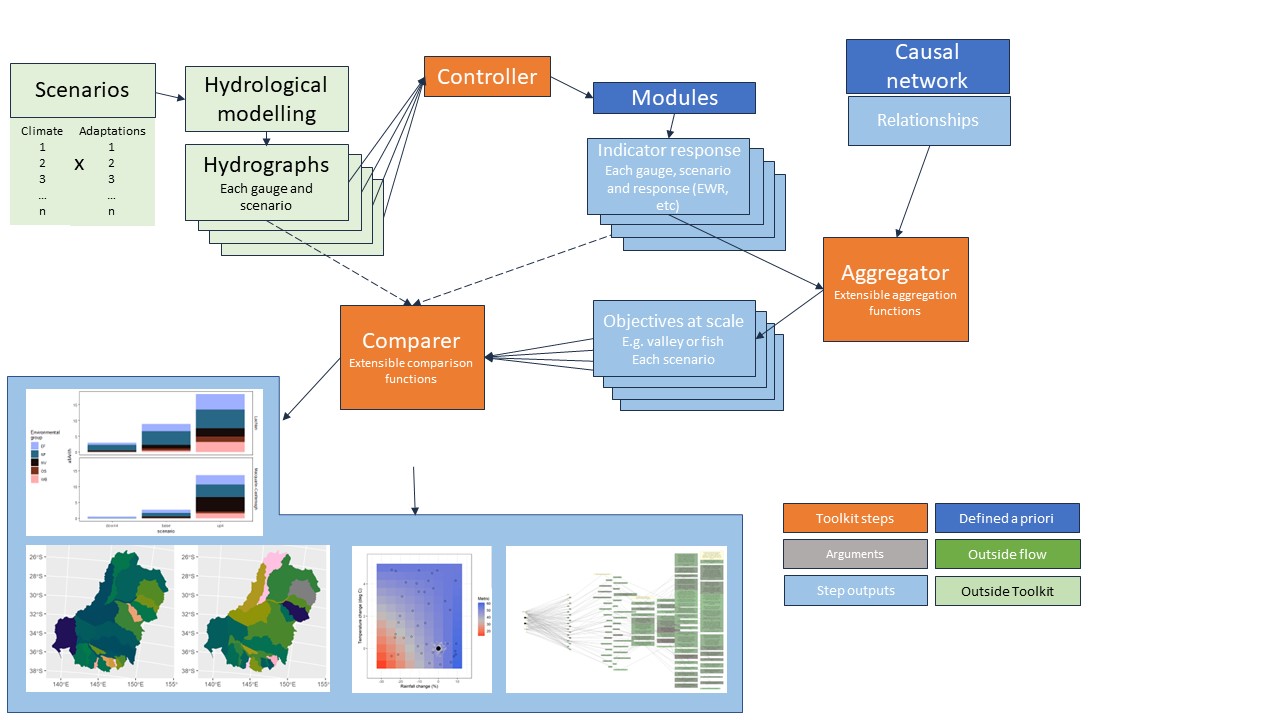
Toolkit flow
-
Python notebooks exist, but are not maintained. Contact authors if needed.
-
Space alone with more options- includes multilevel spatial agg into different polygons and complex aggregation functions
-
bar, line, maps, and causal networks all provide plotting of outcomes from the toolkit
Necessary pieces but not part of the data flow in the toolkit
-
- Causal networks are needed for aggregation and some plotting, but are not part of the flow per-se. Much of this will be integrated into the Comparer module
-
Scenario creation is not part of the toolkit, but scenarios are needed to run the toolkit
These are simple demo scenarios, but useful for seeing expected formats, and to let the rest of the kit work.
Python notebooks exist, but are not maintained. Contact authors if needed.
In use, the toolkit expects that scenario hydrographs will be available and the causal networks are defined.
Installing werptoolkitr
The {werptoolkitr} package needs to be installed to provide all functions used here. It also provides some necessary data for the causal network relationships, and (at least for now) canonical shapefiles that have been prepped.
Typically install it from github over SSH while the package is private.
The package allowing SSH install is broken in R 4.3, so in that case and for rapid development, clone the repo and use devtools::install_local (or even just to load_all), but these rely on paths that aren’t portable and are more manual to keep up with updates.
# LOCAL INSTALL- easier for quick iterations, but need a path.
devtools::install_local("C:/path/to/WERP_toolkit", force = TRUE)

# And for very fast iteration (no building, but exposes too much, often)
devtools::load_all("C:/path/to/WERP_toolkit")
Load the package
library(werptoolkitr)Github and development
See the repo readme for overall structure of the repo and additional dev info for package installation issues and development, and the {werptoolkitr} repo for the package itself.
Using notebooks
Most notebooks that generate outputs have a REBUILD_DATA parameter in the yaml header that is set to FALSE to avoid overwriting data. To rebuild the data, we can manually change them to TRUE, or on a case-by-case basis at the terminal quarto render path/to/file.qmd -P REBUILD_DATA:TRUE, and for all files in the project (dangerous!), quarto render -P REBUILD_DATA:TRUE.
If there is unexpected behaviour, e.g. changes not reflected in the output, check the _cache files and probably throw them out. Caching speeds up by not re-running code and is supposed to notice changes and re-evaluate, but sometimes hangs on when it shouldn’t.